
T
here is something quietly powerful about makeup that enhances rather than transforms. The kind of look that appears effortless, polished, and calm. The kind of makeup you might wear to the office, to a morning meeting, or even just on a day when you want to feel composed and put together without appearing overly made up.
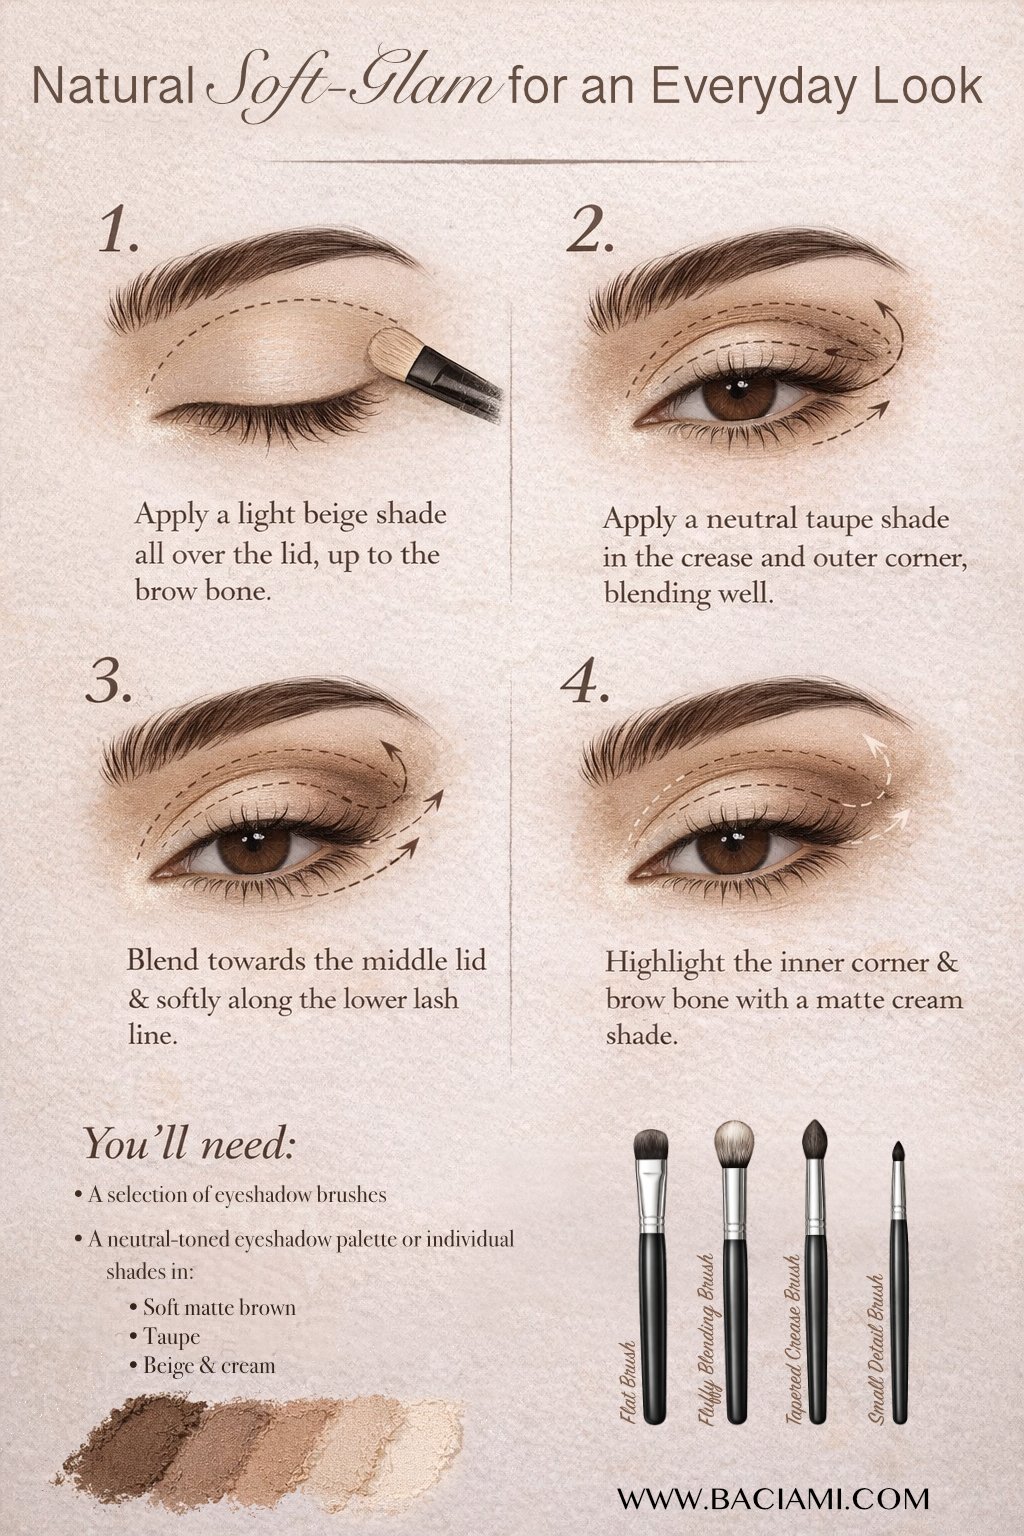
This everyday routine focuses on soft neutral tones, gentle blending, and subtle definition. The colours remain natural, the textures light, and the overall finish clean and refined. A slightly deeper shade in the crease adds just enough dimension to shape the eyes while maintaining that understated elegance.
For this tutorial we will be using a high-quality neutral palette, along with a few well-designed brushes available from Sephora. The tools used throughout the look include:
- Flat shader brush
- Fluffy blending brush
- Tapered crease brush
- Small detail brush
- Powder brush
- Blush brush
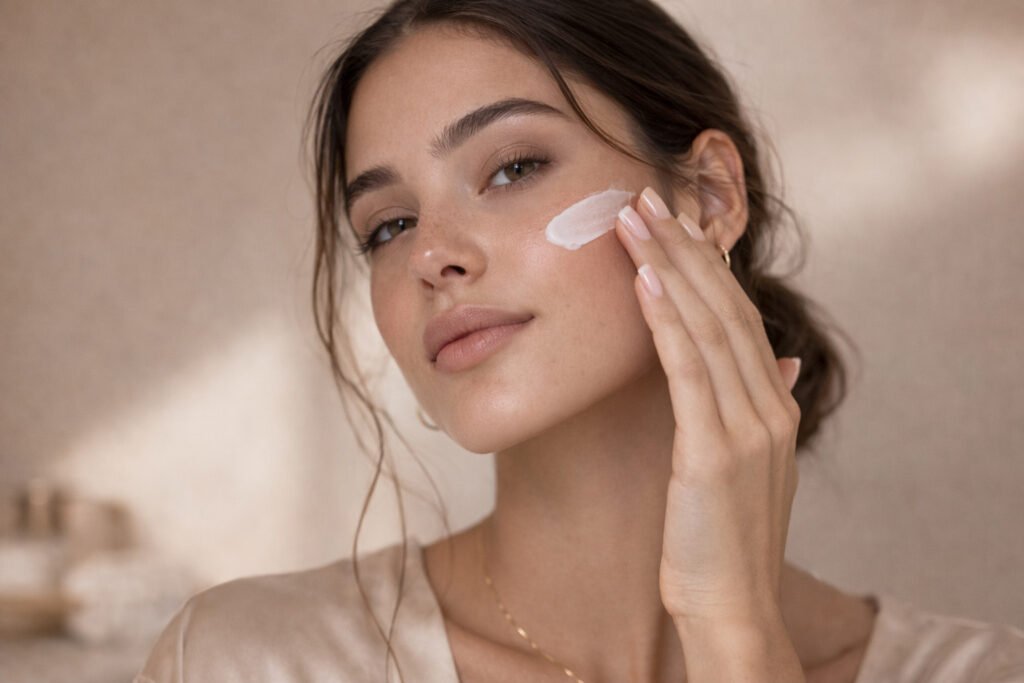
Step 1 – Preparing the Skin
Every beautiful makeup look begins with well-prepared skin. Even the most luxurious eyeshadow palette cannot compensate for skin that feels dry or uneven, so the first step is always to create a smooth and hydrated base.
Start by applying your usual skincare routine: a lightweight moisturiser followed by sunscreen if it is daytime. Give the skin a moment to absorb the product before moving on to makeup.
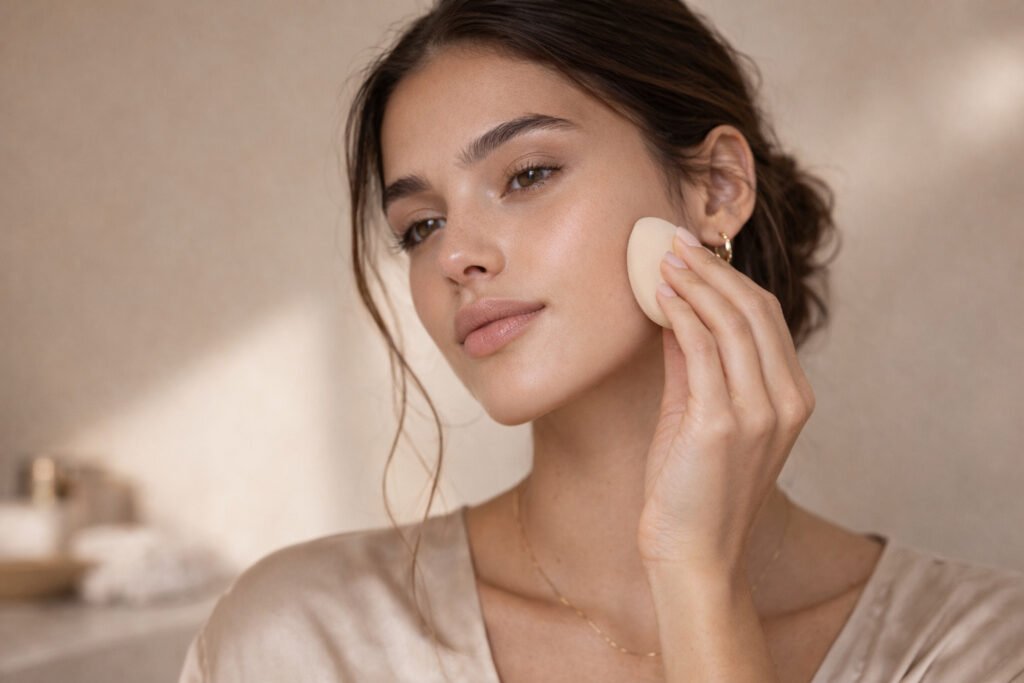
Apply a small amount of foundation or skin tint, blending it gently with a foundation brush or makeup sponge until the complexion looks even but still natural. The goal is not heavy coverage; instead, aim for a soft, fresh base that allows the natural texture of the skin to remain visible.
If necessary, add a touch of concealer beneath the eyes or around areas that require a little extra coverage. Once the base is blended, lightly set the complexion with translucent powder using a powder brush, sweeping the brush softly across the forehead, nose, and chin.
The skin should now appear smooth, softly matte in some areas, and still luminous in others.
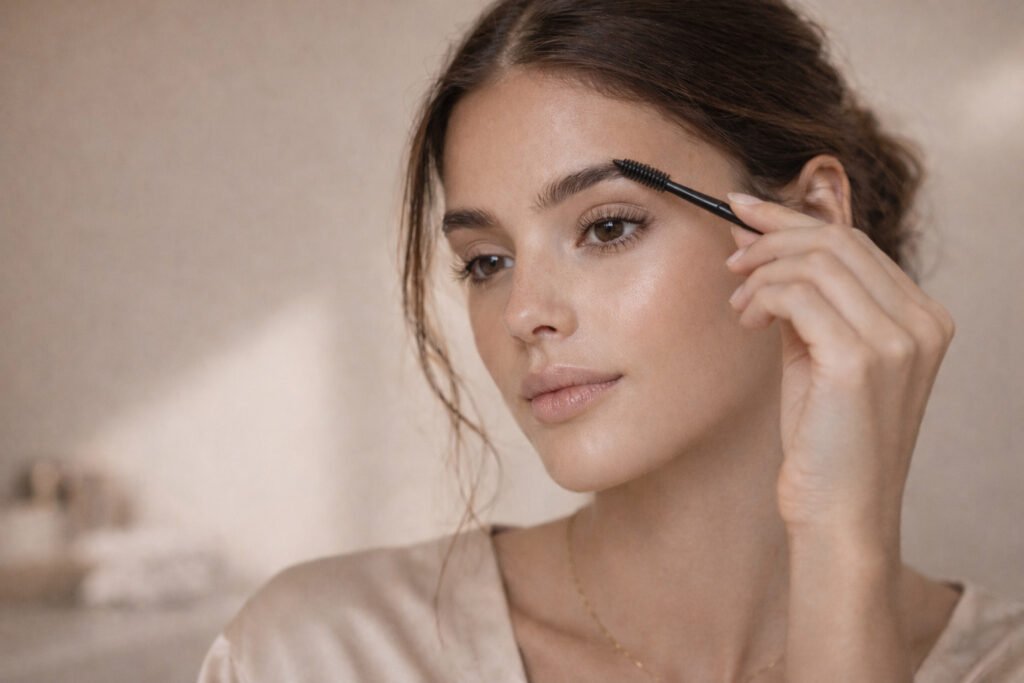
Step 2 – Grooming the Brows
Before moving to the eyeshadow, it helps to quickly shape the brows. Even minimal grooming can frame the face and make the entire look feel more polished.
Brush the brows upward using a spoolie, following their natural direction. If needed, fill any sparse areas using a brow pencil or powder that closely matches the natural brow colour. Keep the strokes light and feathery so the brows remain soft rather than overly defined.
Finish by brushing through the brows once more so that the colour blends seamlessly.
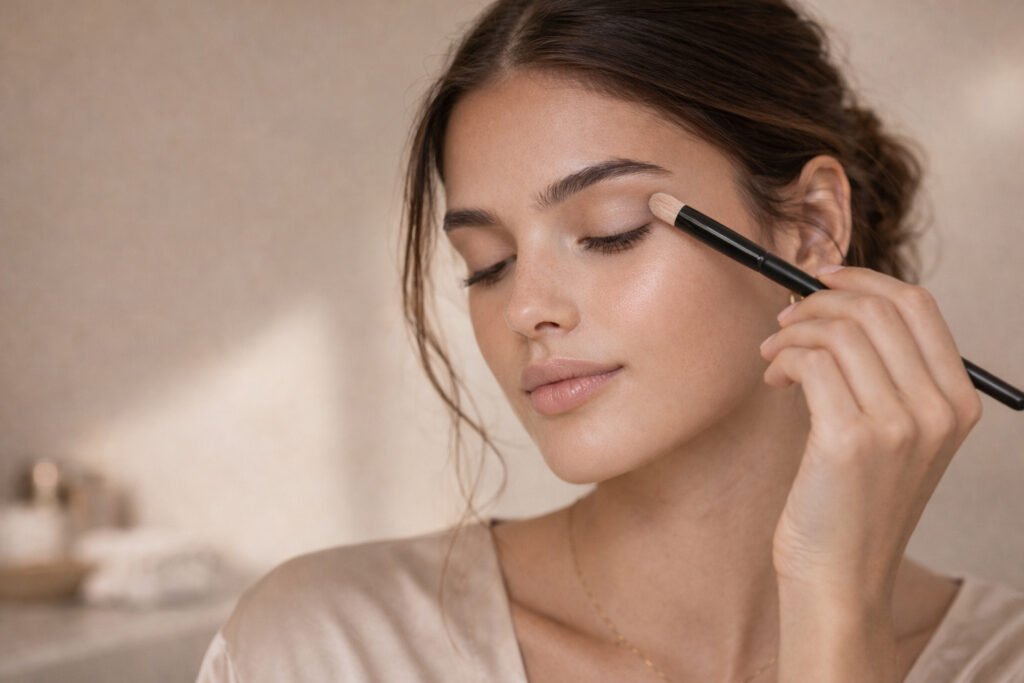
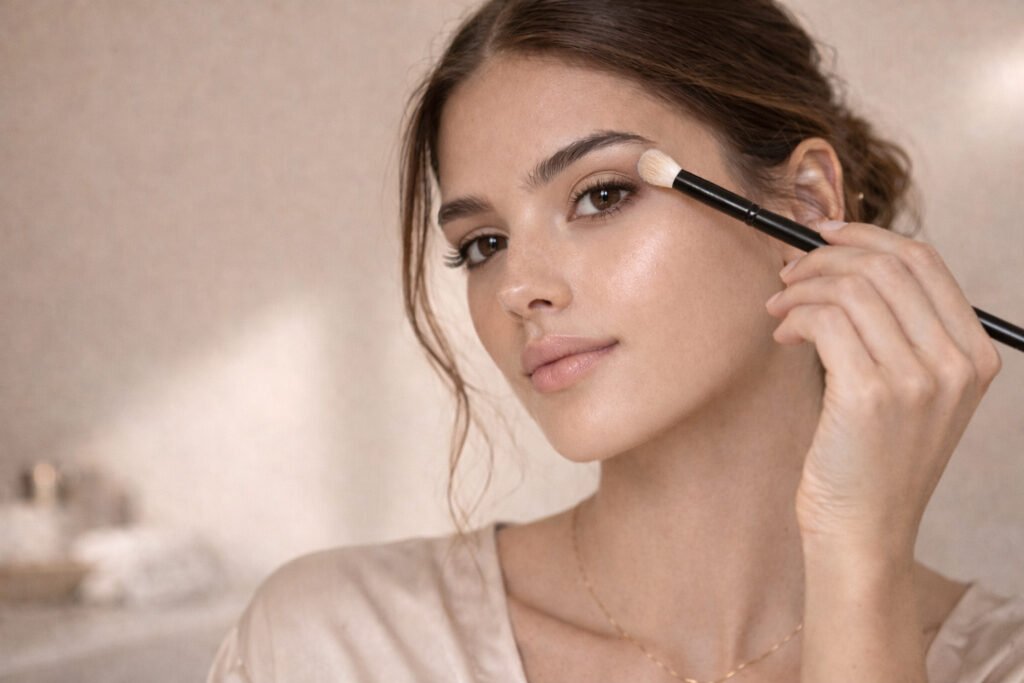
Step 3 – Creating a Neutral Base on the Eyelid
Now the eyeshadow begins.
Using a flat shader brush, pick up a soft neutral shade that is close to your natural skin tone.
Press the shadow gently across the eyelid from lash line to just below the crease. Rather than sweeping the brush back and forth, use light pressing motions so the colour settles evenly across the lid.
This step may seem subtle, but it serves an important purpose. It smooths the eyelid and creates a base that allows the other shades to blend more easily, preventing patchiness and harsh lines later on.
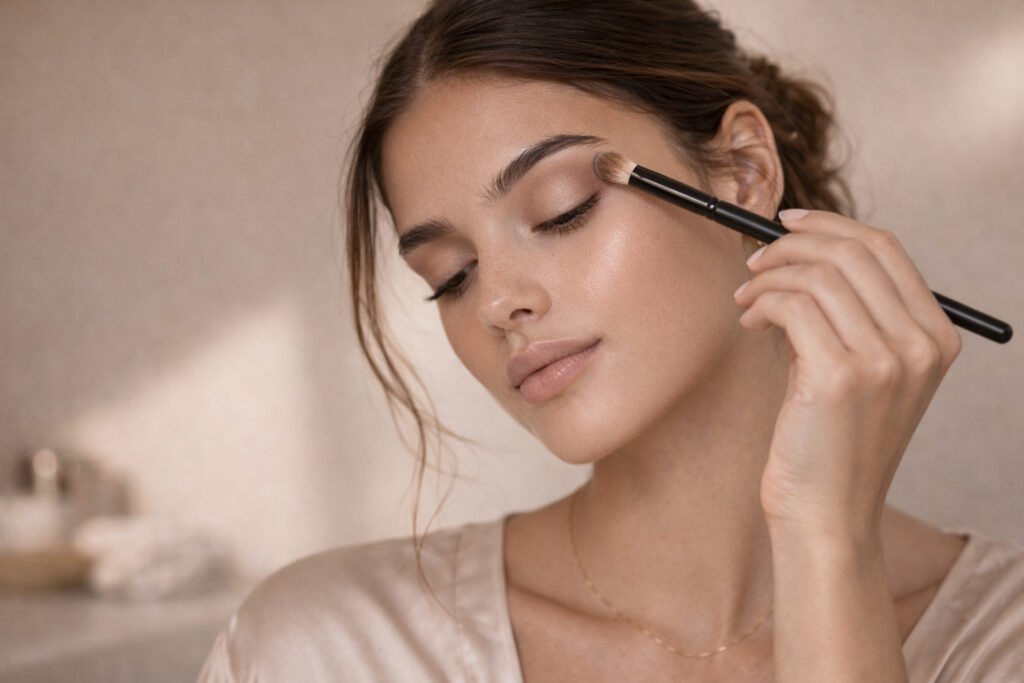
Step 4 – Adding a Transition Shade
To create dimension, the next step introduces a slightly warmer tone.
Take a fluffy blending brush and dip it into a soft beige or light caramel shade from the palette. Tap off any excess powder so the colour remains gentle.
Sweep the brush softly through the area just above the crease using small circular motions. This shade acts as a transition between the lid colour and the deeper tones that will follow, creating the soft gradient that makes eye makeup appear professional and diffused.
Blend slowly and patiently, allowing the colour to build gradually rather than applying too much at once.
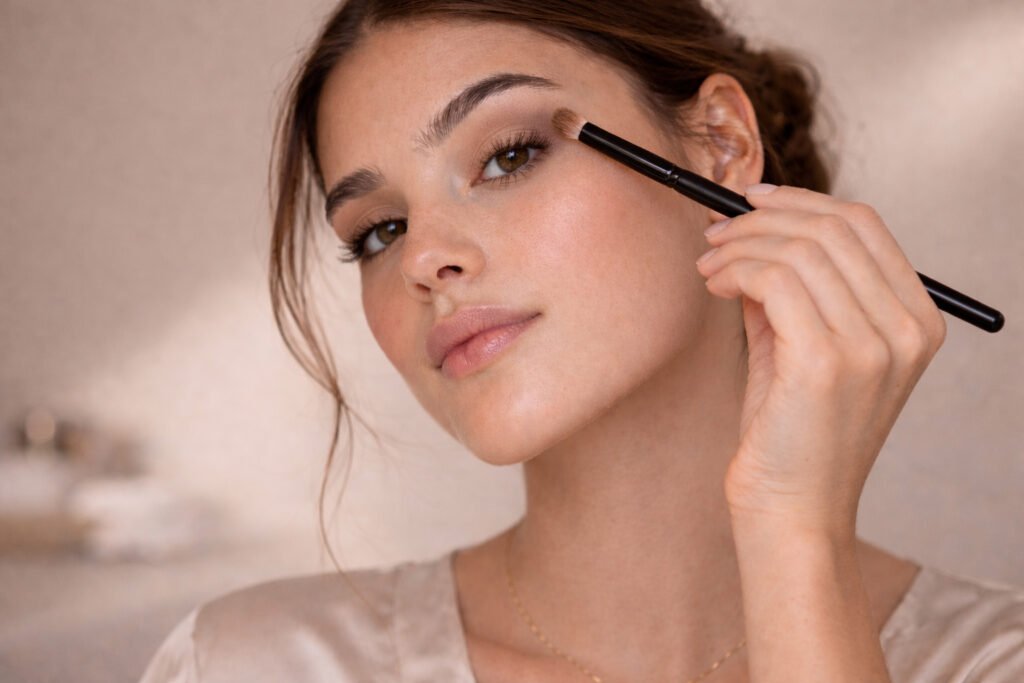
Step 5 – Defining the Crease
This is where the eye shape begins to gain more definition while still remaining natural.
Using a tapered crease brush, select a medium neutral brown shade from the palette. This tone should be deeper than the transition shade but still soft enough to maintain the everyday feel of the look.
Place the brush directly into the crease and move it gently from the outer corner toward the centre of the eye. Keep the colour concentrated within the crease itself while softly blending the edges upward.
This subtle depth helps contour the eye, giving it structure and dimension without appearing heavy.
Step 6 – Deepening the Outer Corner
For a little more shape, the outer corner of the eye can be softly deepened.
Using a slightly deeper brown shade and a small blending or detail brush, apply the colour to the outer corner of the eyelid. Focus on the area where the upper lash line meets the crease, forming a very soft V shape.
Blend the colour inward slightly while keeping the centre of the eyelid lighter. This contrast between light and dark creates a gentle lifting effect that opens the eyes.
The key here is restraint. The look should remain soft and wearable for daytime.
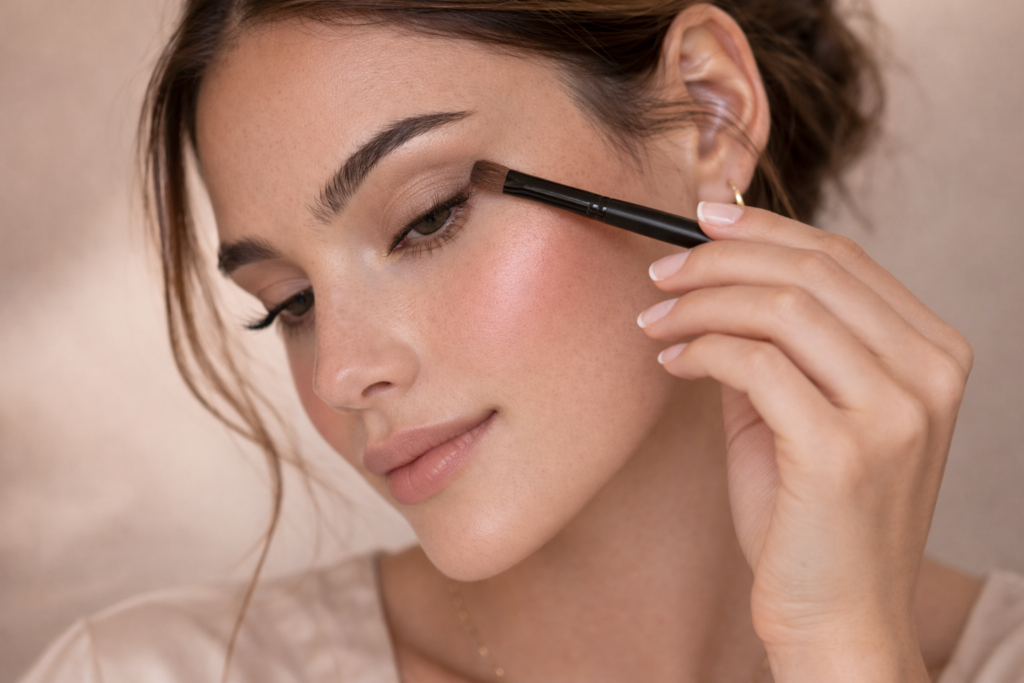
Step 7 – Soft Lash Line Definition
Instead of using a harsh liquid liner, this look uses eyeshadow to create a more natural effect.
Take the same deeper brown shade and apply it lightly along the upper lash line using a small detail brush. Press the shadow gently into the lashes, creating a soft shadow rather than a sharp line.
This technique subtly frames the eyes and enhances the lashes without drawing too much attention.
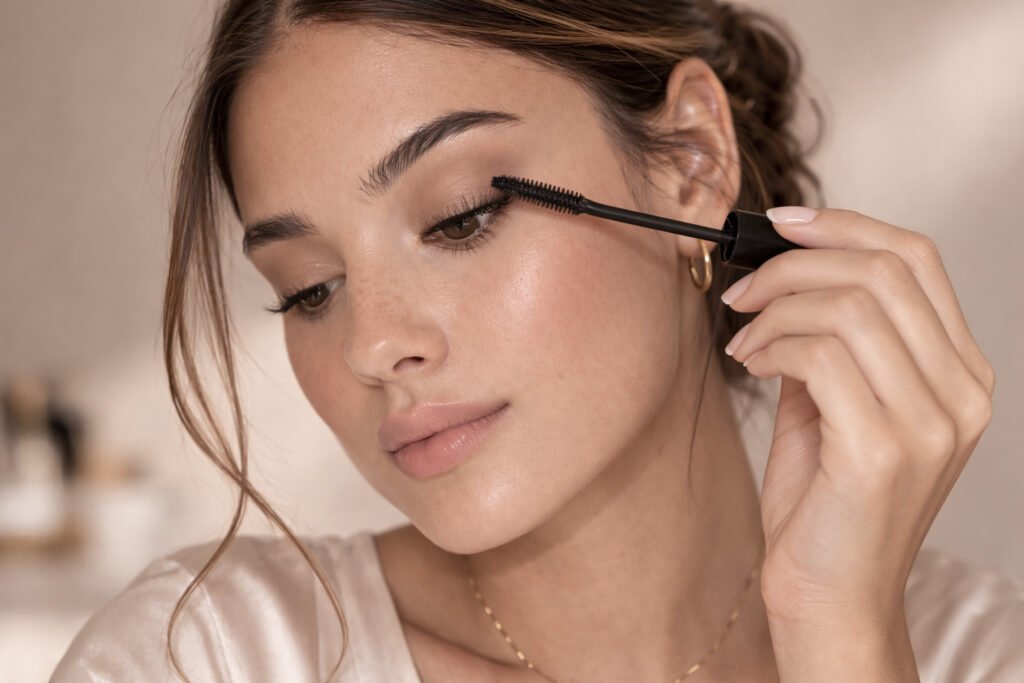
Step 8 – Mascara
Apply one or two coats of mascara, focusing on lifting and separating the lashes rather than building heavy volume.
Start at the base of the lashes and gently wiggle the wand upward. Pay special attention to the outer lashes, which helps accentuate the shape created in the previous steps.
The lashes should appear longer and more defined while still maintaining the natural character of the look.
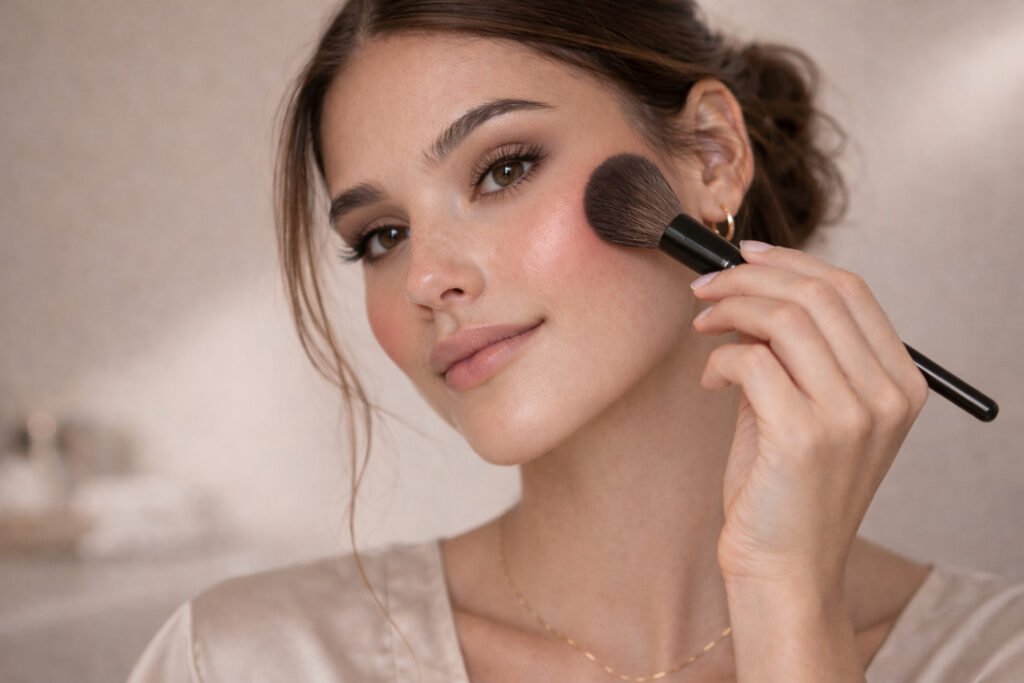
Step 9 – Adding Soft Colour to the Cheeks
A touch of blush brings warmth and life back to the complexion.
Using a blush brush, pick up a soft peach, rose, or neutral pink shade and tap away any excess powder. Smile gently and sweep the brush across the apples of the cheeks, blending the colour slightly upward toward the temples.
The effect should be subtle, creating a natural flush rather than a dramatic pop of colour.
Step 10 – Finishing Touches
To complete the look, add a neutral lip colour such as a soft rose lipstick or tinted balm. These tones complement the neutral eyes and help keep the overall appearance polished and refined.
At this stage the makeup should feel balanced and harmonious: softly sculpted eyes, natural warmth in the cheeks, and a complexion that still looks like skin.
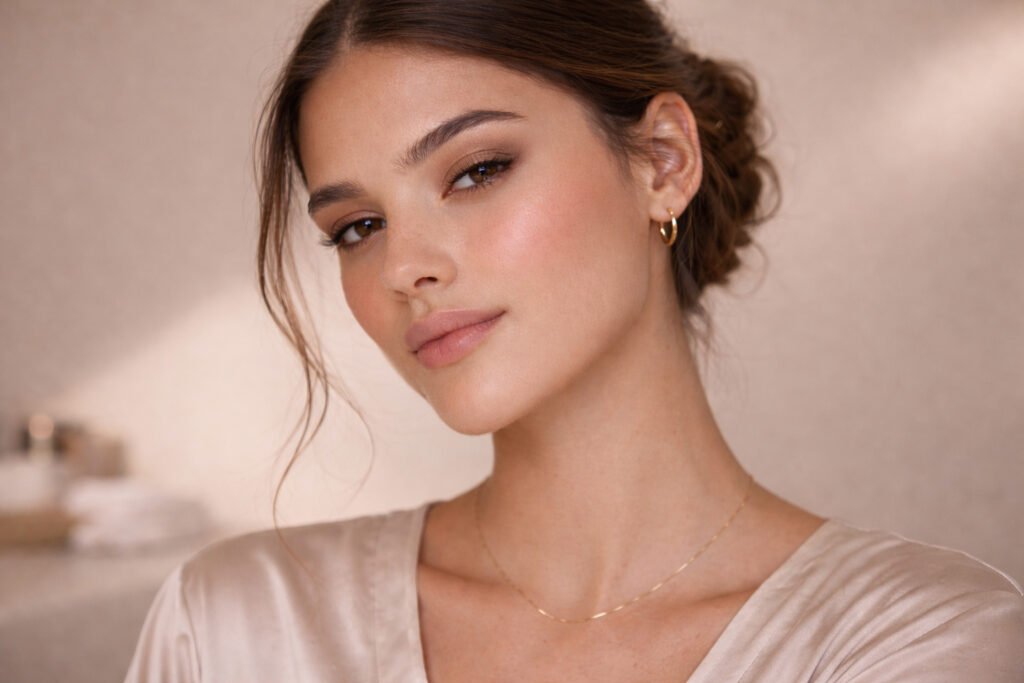
The Result
The finished look is calm, confident, and versatile. Neutral shades blend seamlessly together, the crease adds gentle depth, and the complexion remains fresh and natural.
It is the type of makeup that suits a professional setting yet still feels elegant enough for everyday life. A quiet confidence look that enhances natural features rather than competing with them.
✨ Free Download ✨
A refined visual edit of Soft-Glam Eyeshadow – this complimentary guide offers a curated snapshot of the eyeshadow steps from the full tutorial 🖤
